Connect Android to Computer
Why Connect Your Android Device to a Computer?
To use Fonelora Location Changer, you need to connect your Android device to your computer. This connection enables the software to access and modify your device's GPS data, allowing you to:
• Change your location instantly
• Simulate real-time movement
• Use advanced features like Jump Teleport Mode, Single-Spot Mode, Multi-Spot Mode, and Joystick Mode
By establishing a stable connection, you can ensure smooth performance and accurate location simulation.
System Requirements
Before connecting, please ensure your devices meet the following requirements:
Computer
• Windows: Windows 10 / Windows 11
• Mac: macOS 10.15 or later
Android Device
• Android Version: Android 5.0 or later
Supported Connection Methods
• USB connection (recommended for better stability)
• Wi-Fi connection (wireless convenience)
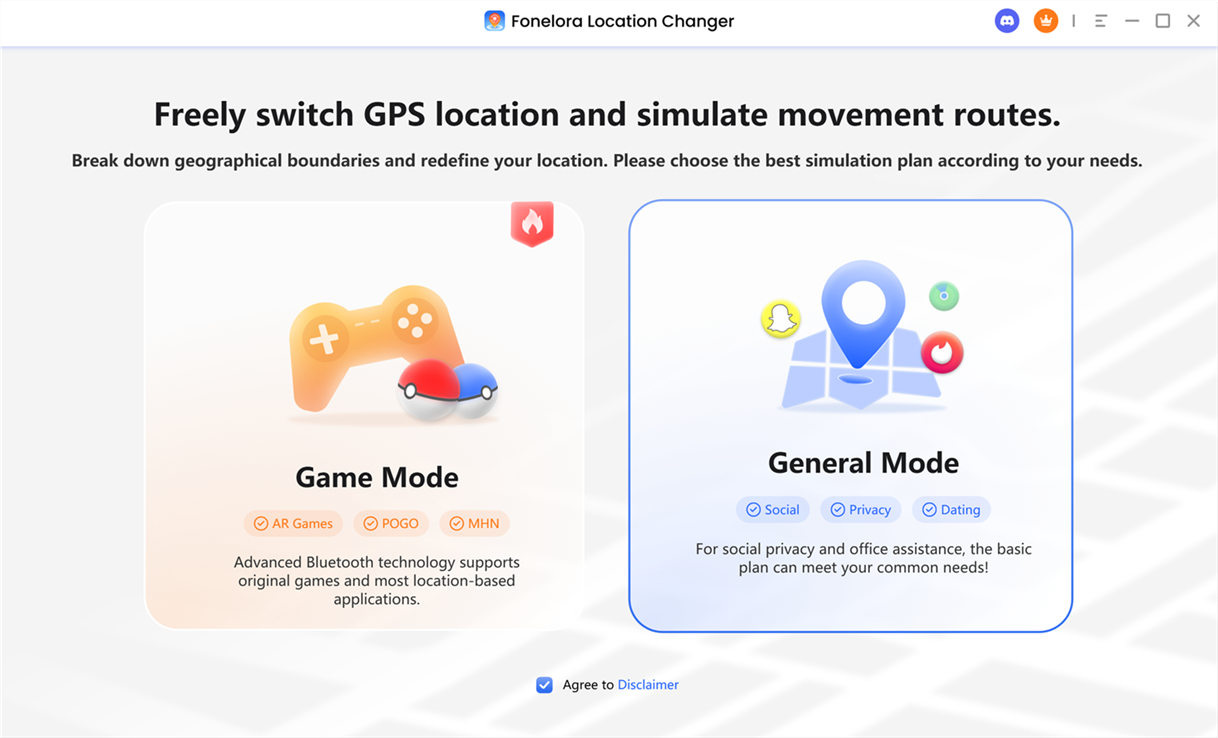
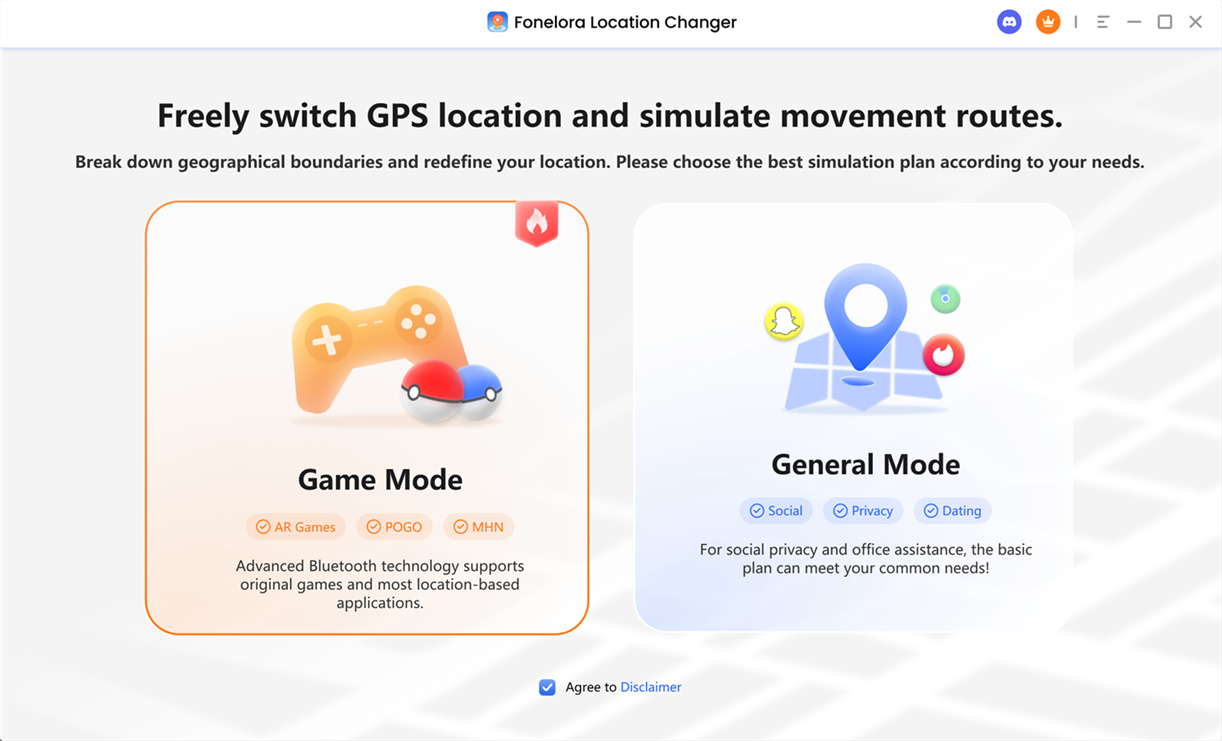
Part 1. How to Connect the Android Device with USB/WiFi in General Mode
When Should You Use General Mode?
General Mode is designed for simple and stable GPS location changes. It is suitable for most everyday scenarios and offers a fast and seamless setup process.
You should choose General Mode if you want to:
• Change GPS location easily
• Simulate basic routes between two points
• Test location-based apps
Follow the steps below to connect your Android device in General Mode.
Step 1. Download and Install Fonelora Location Changer.
Visit the official website to download Fonelora Location Changer to your computer. Please ensure your internet connection is stable during the download and installation process. Then follow the on-screen instructions to complete the installation.
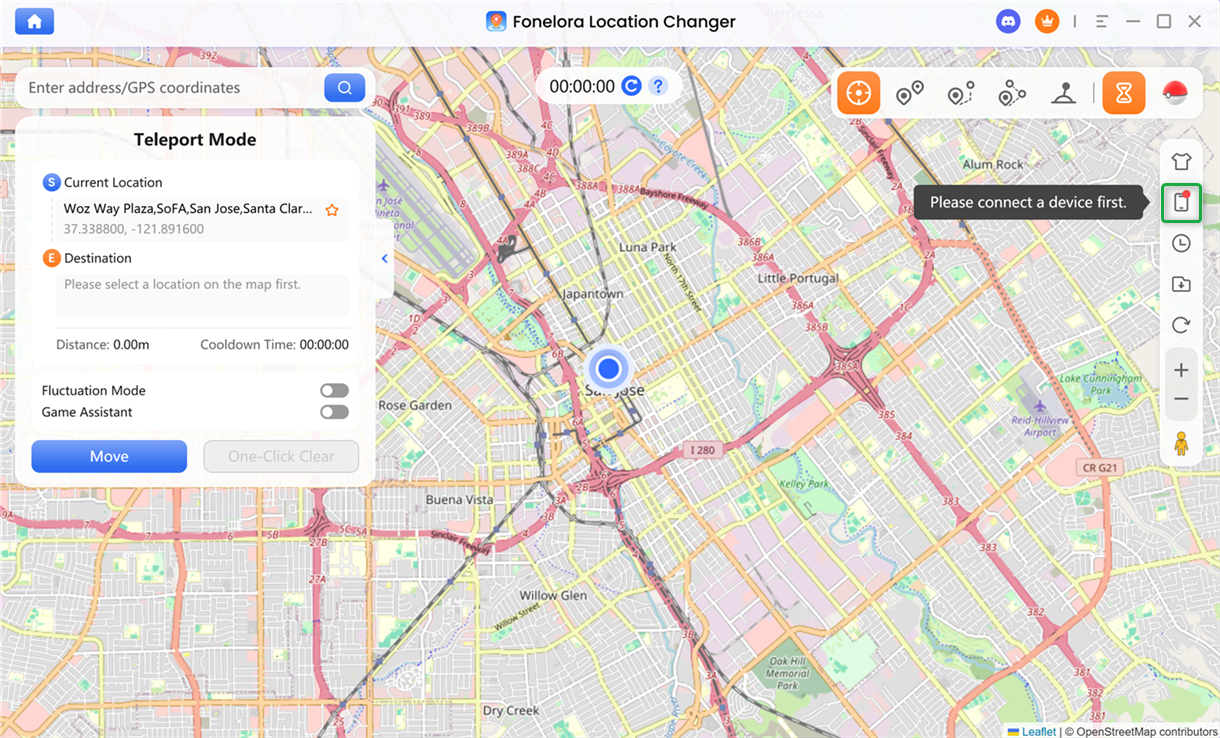
Step 2. Launch the Program and Connect Your Device.
After installation, open Fonelora Location Changer on your computer and select General Mode.
Choose General Mode
Click the Device icon in the interface, then connect your Android device to the computer. For the first-time setup, only a USB connection is supported. Please use a USB cable to complete the initial connection.
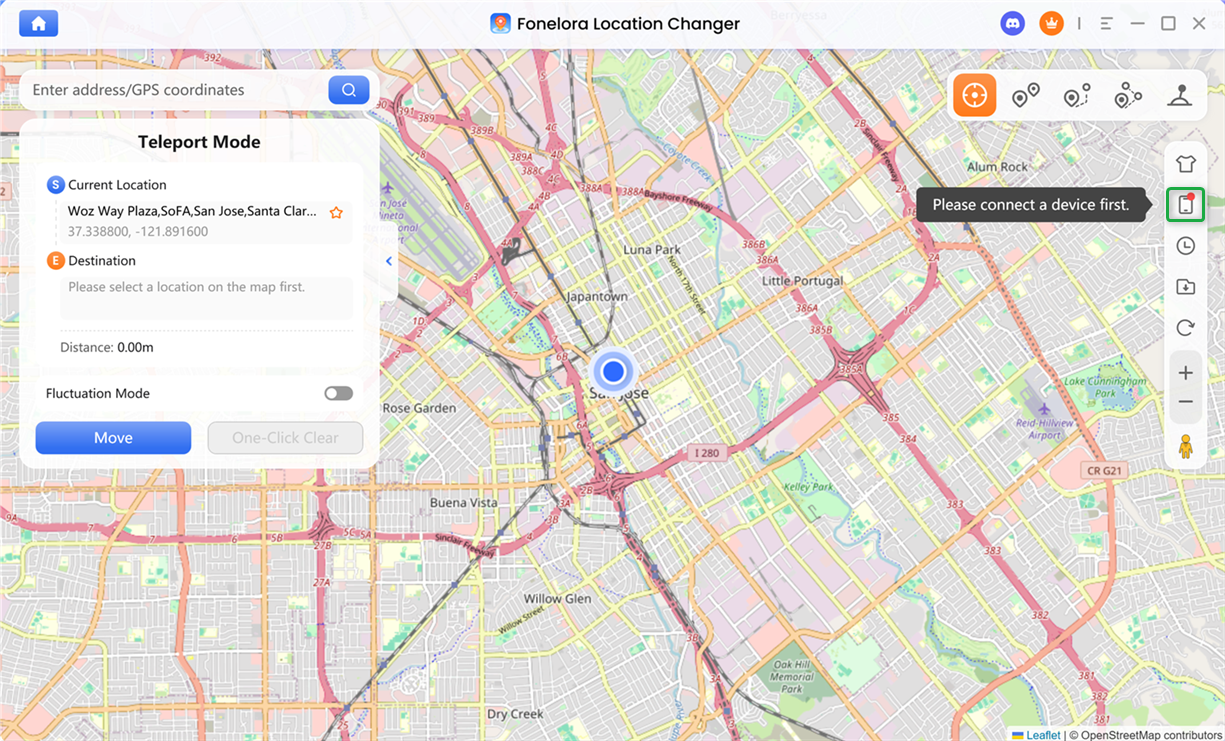
Click Device Icon
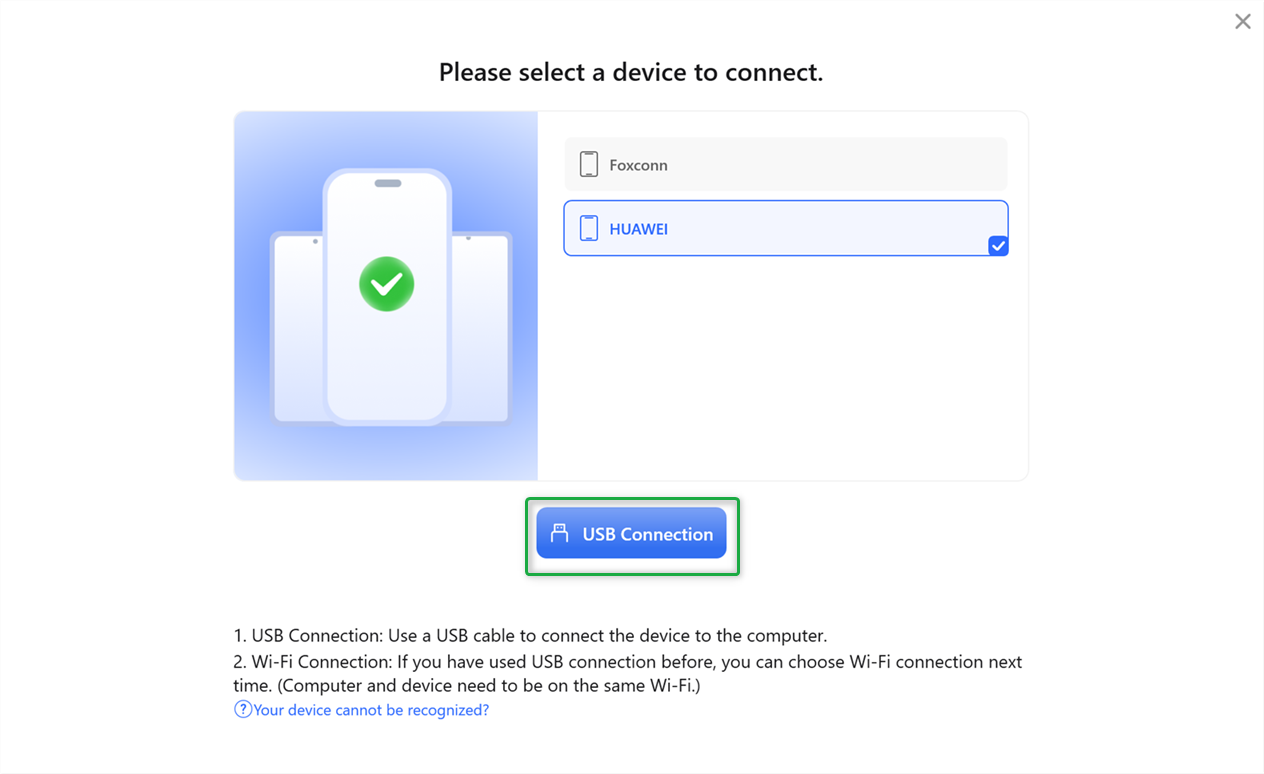
Once your device is detected, select it from the device list and follow the on-screen instructions to proceed with USB Connection.

Choose USB Connection
After completing the first USB connection, you can switch to a Wi-Fi connection in future sessions, as long as your computer and Android device are connected to the same network. Please note that Wi-Fi connection is not supported for the initial setup.
Step 3. Set USB Connection Mode.
After your device is connected with a USB cable, make sure the USB connection mode is set correctly. In most cases, you should select Media Transfer Protocol (MTP), which is the recommended option for stable communication.
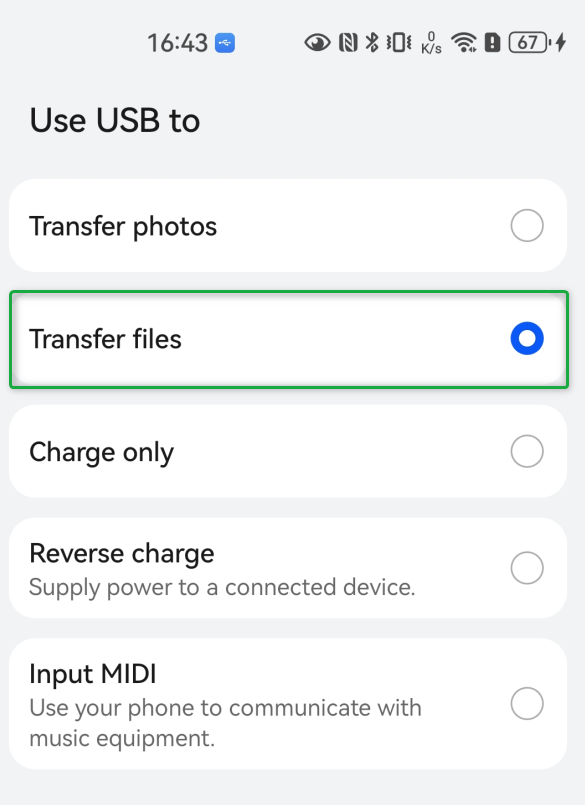
Select Media Transfer Protocol
Step 4. Activate Developer Mode.
To allow proper communication between the program and your device, you need to activate Developer Mode. To do this, go to Settings > About Phone, then tap Build Number (or System Version) seven times until a confirmation message appears.
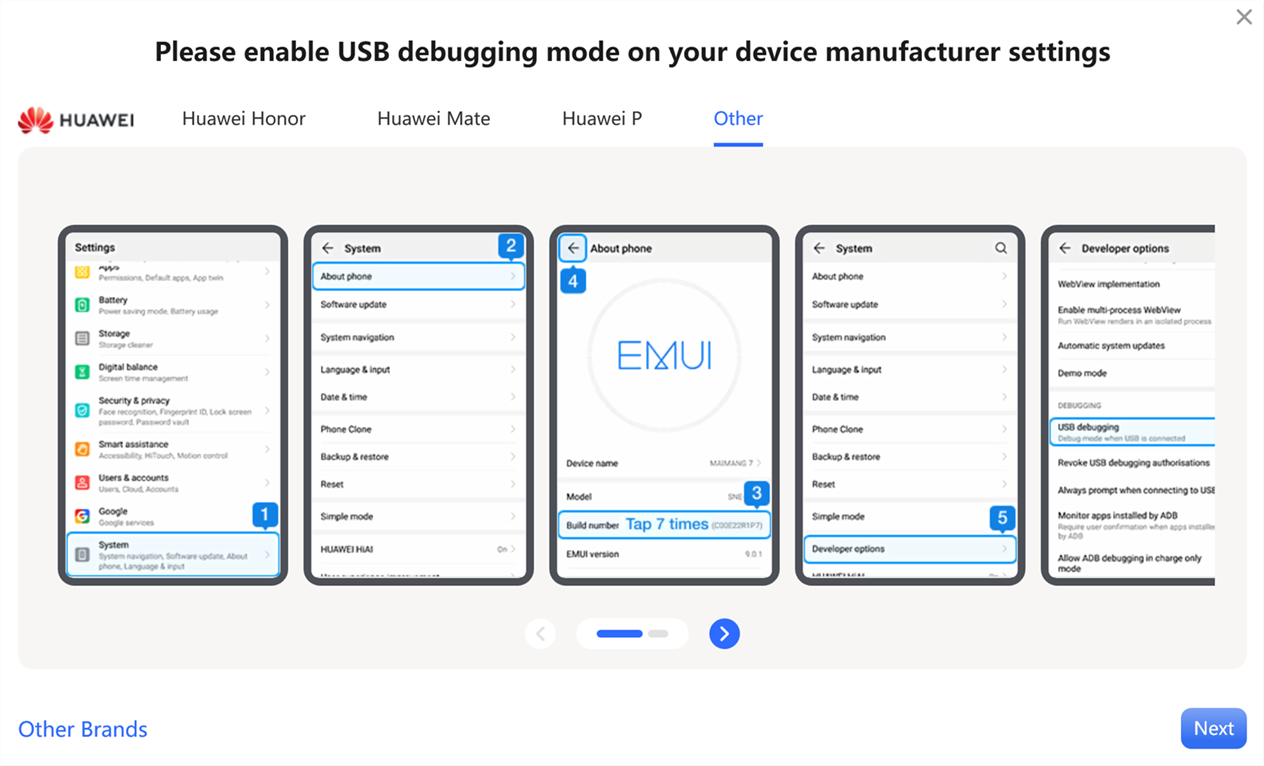
Activate Developer Mode
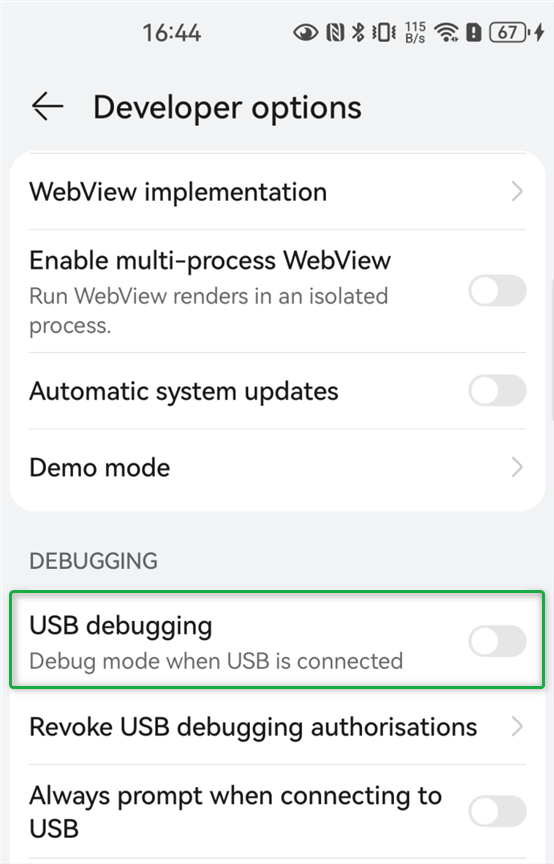
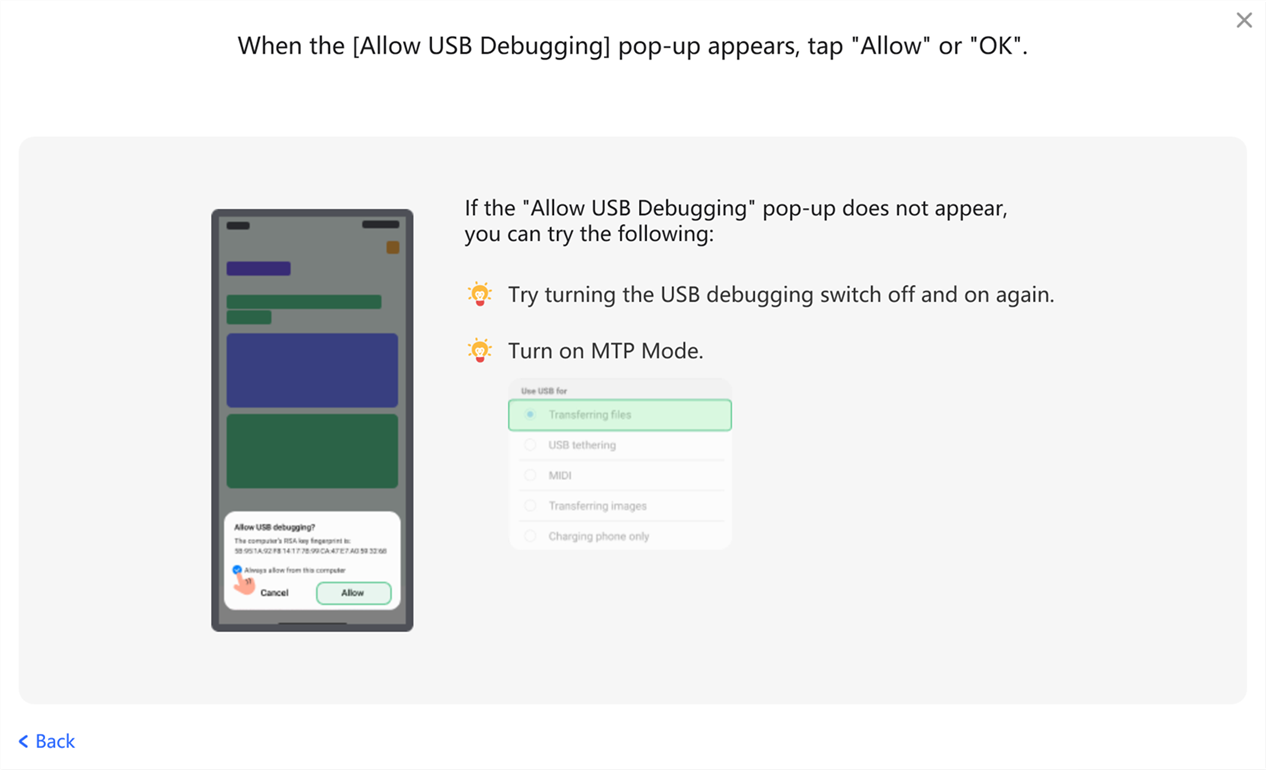
Step 5. Turn On USB Debugging.
Once Developer Mode is enabled, enter Developer Options and turn on USB Debugging. Some Android devices may also require you to enable the option to install apps via USB.
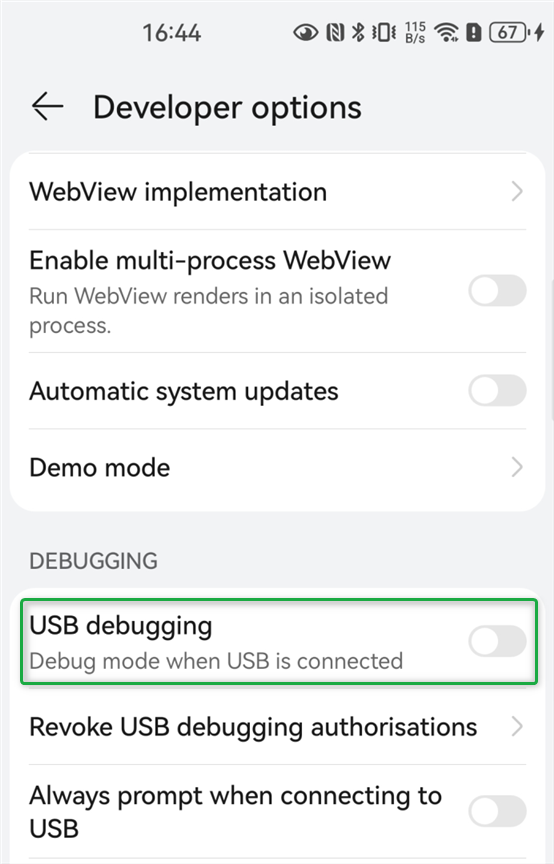
Turn On USB Debugging
After enabling this setting, a permission request should appear on your phone. Tap Allow to authorize the connection. If the authorization pop-up does not appear, you can click Show Again in the program to trigger it.

Tap Allow Option
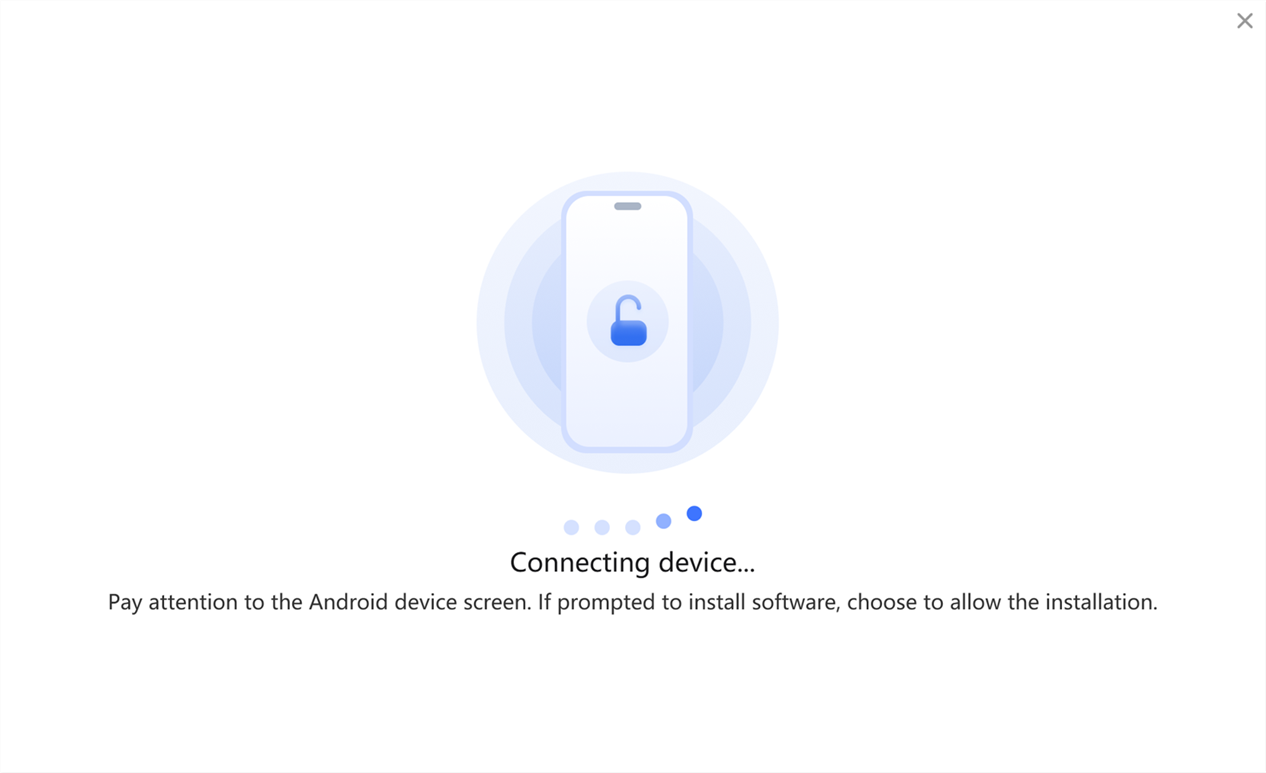
Step 6. Load Your Android Device.
Then, the program will begin detecting and loading your device. Please keep your device connected and unlocked during this process to ensure it is recognized properly. The system will automatically retrieve the necessary information for the next step.
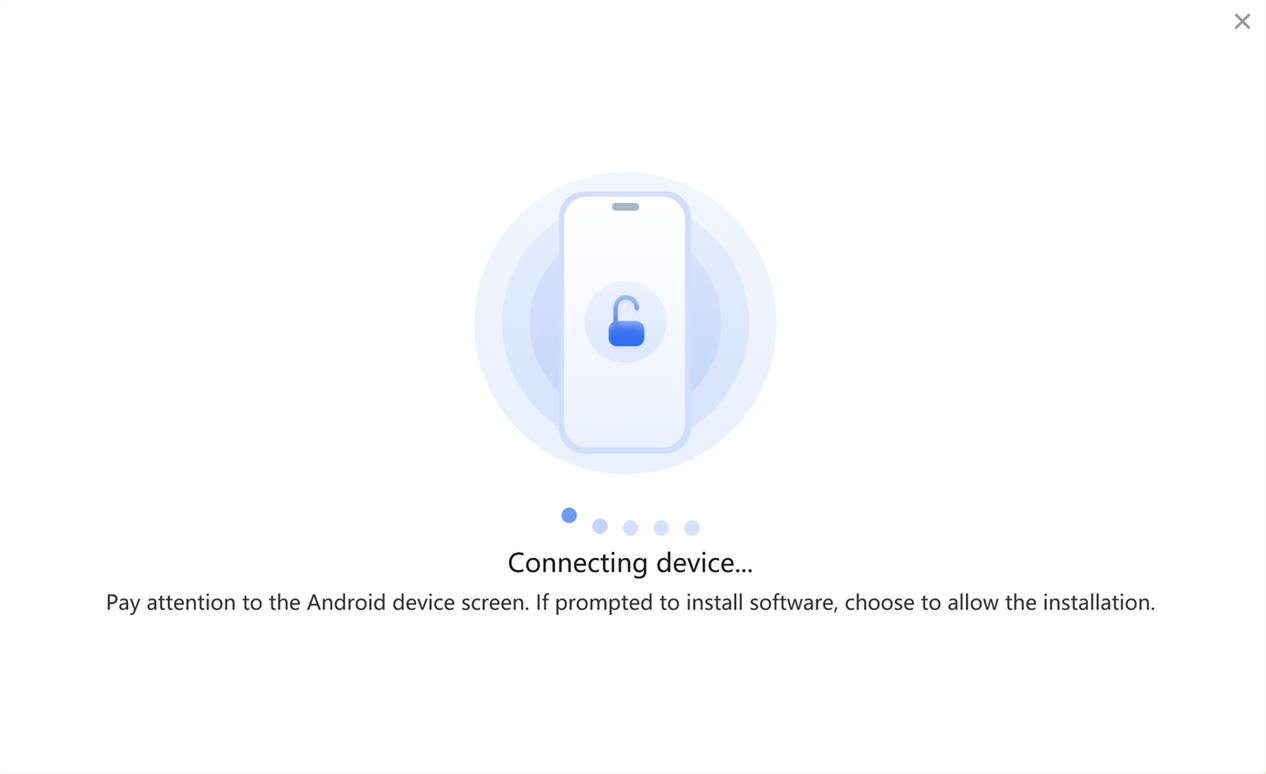
Load Your Android Device
Step 7. Complete Android Device Connection.
Once your device is successfully loaded, follow the on-screen instructions to complete the setup. On your phone, open Developer Options, tap Select mock location app, and choose Fonelora GPSLocate in the pop-up, allowing the program to control and modify your device's location correctly.
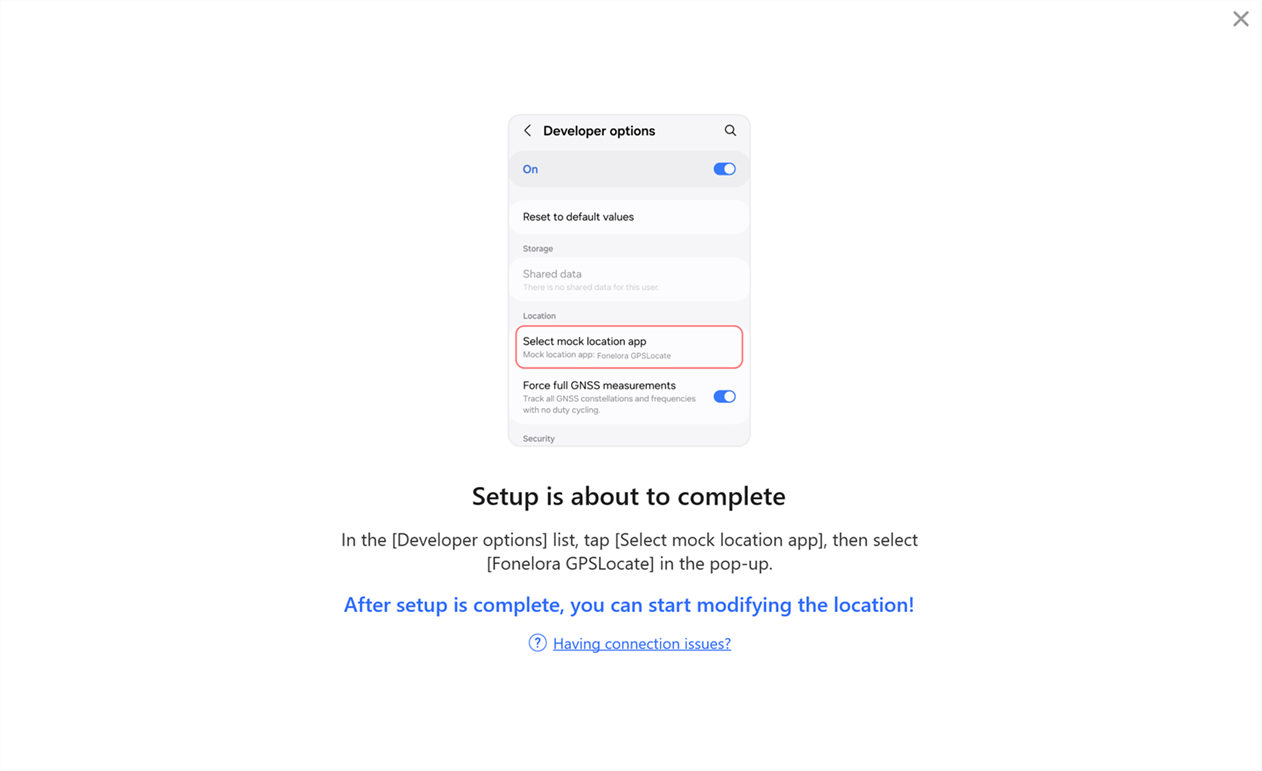
Select Mock Location App
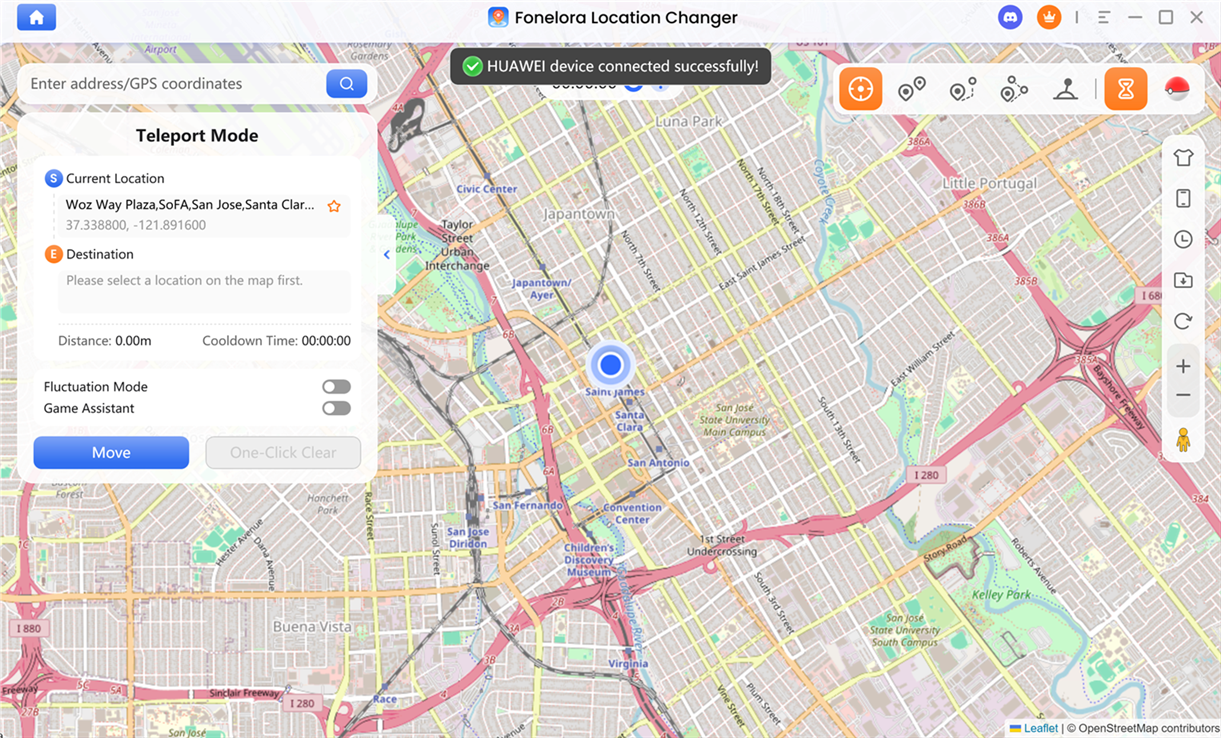
After completing this step, your device will be ready for location modification in General Mode.
Complete Android Device Connection
Part 2. How to Connect the Android Device with USB/WiFi in Game Mode
When Should You Use Game Mode?
Game Mode is designed for location-based games and advanced GPS simulation. Compared to General Mode, it provides better stability and improved compatibility for gaming scenarios.
You should choose Game Mode if you want to:
• Play AR or GPS-based games safely
• Improve anti-detection stability
• Achieve more realistic in-game movement
Follow the steps below to connect your Android device in Game Mode.
Step 1. Download and Install Fonelora Location Changer.
Visit the official website to download Fonelora Location Changer to your computer. Please ensure your internet connection is stable during the download and installation process. Then follow the on-screen instructions to complete the installation.
Step 2. Launch the Program and Connect Your Device.
After installation, open Fonelora Location Changer on your computer and select Game Mode.
Choose Game Mode
Click the Device icon in the interface, then connect your Android device to the computer. For the first-time setup, only a USB connection is supported. Please use a USB cable to complete the initial connection.
Click Device Icon
Once your device is detected, select it from the device list and follow the on-screen instructions to proceed with USB Connection.
Choose USB Connection
After completing the first USB connection, you can switch to a Wi-Fi connection in future sessions, as long as your computer and Android device are connected to the same network. Please note that Wi-Fi connection is not supported for the initial setup.
Step 3. Set USB Connection Mode.
After your device is connected with a USB cable, make sure the USB connection mode is set correctly. In most cases, you should select Media Transfer Protocol (MTP), which is the recommended option for stable communication.

Select Media Transfer Protocol
Step 4. Activate Developer Mode.
To allow proper communication between the program and your device, you need to activate Developer Mode. To do this, go to Settings > About Phone, then tap Build Number (or System Version) seven times until a confirmation message appears.

Activate Developer Mode
Step 5. Turn On USB Debugging.
Once Developer Mode is enabled, enter Developer Options and turn on USB Debugging. Some Android devices may also require you to enable the option to install apps via USB.
Turn On USB Debugging
After enabling this setting, a permission request should appear on your phone. Tap Allow to authorize the connection. If the authorization pop-up does not appear, you can click Show Again in the program to trigger it.
Tap Allow Option
Then, please select the game you want to download. Fonelora Location Changer currently supports POGO, MHN, DQWalk, and Pikmin.
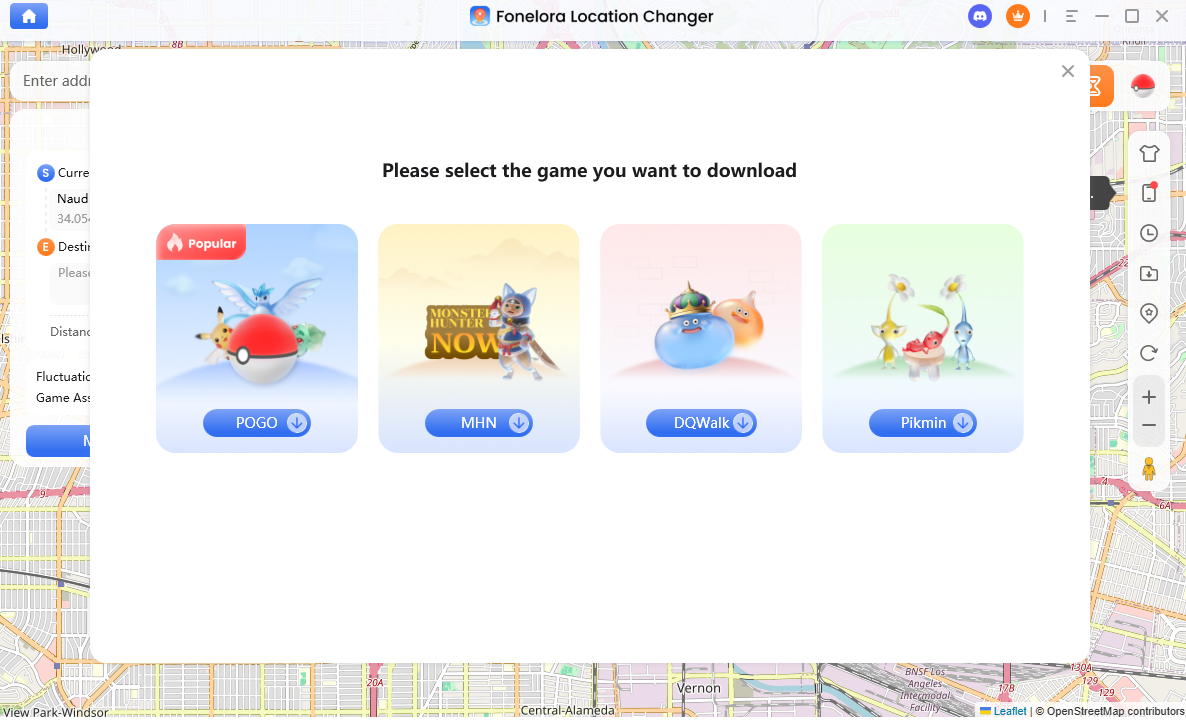
Select the Game to Download
Step 6. Prepare and Install Required Materials.
Then, the program will begin preparing the required materials by downloading the necessary resources automatically. During this process, a customized Android game package will be installed on your device in the background, with a progress indicator shown in the program.
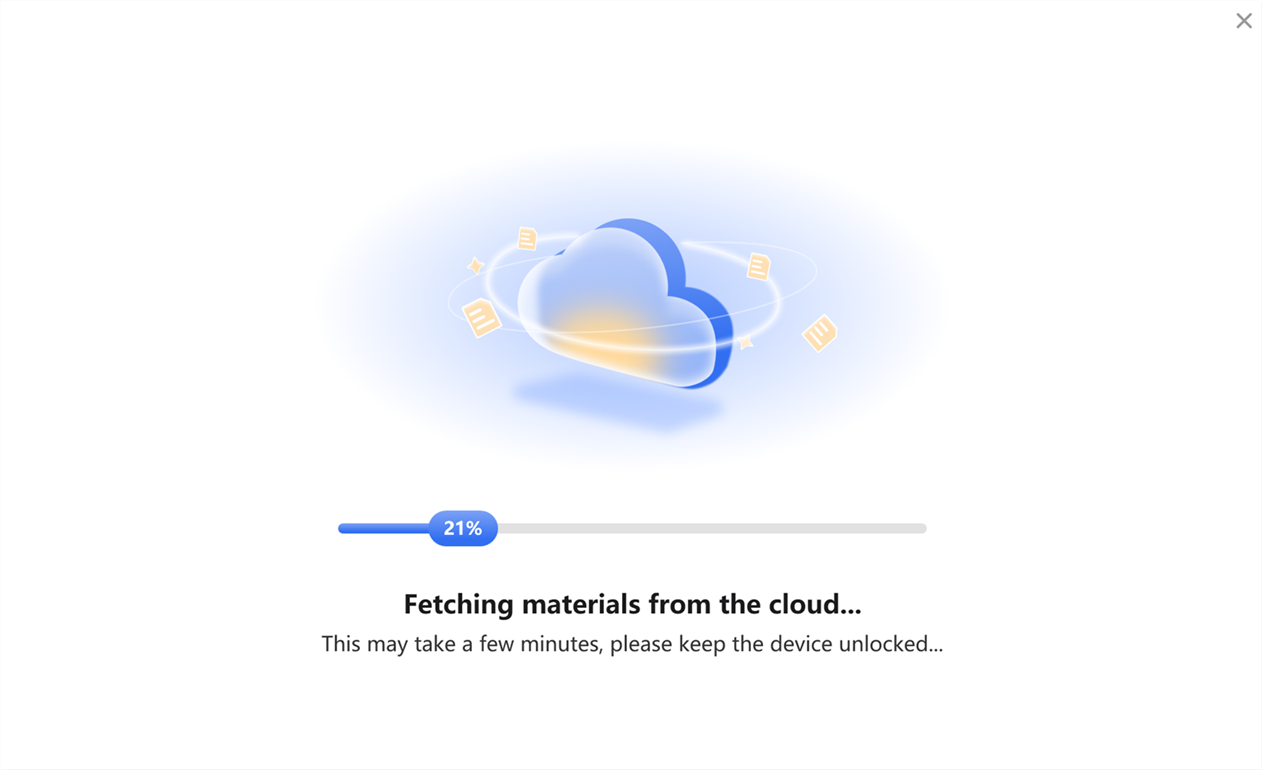
Fetching Materials from the Cloud
Some devices may require you to manually confirm installation permissions or grant additional access. Please keep an eye on your phone and follow any prompts that appear.
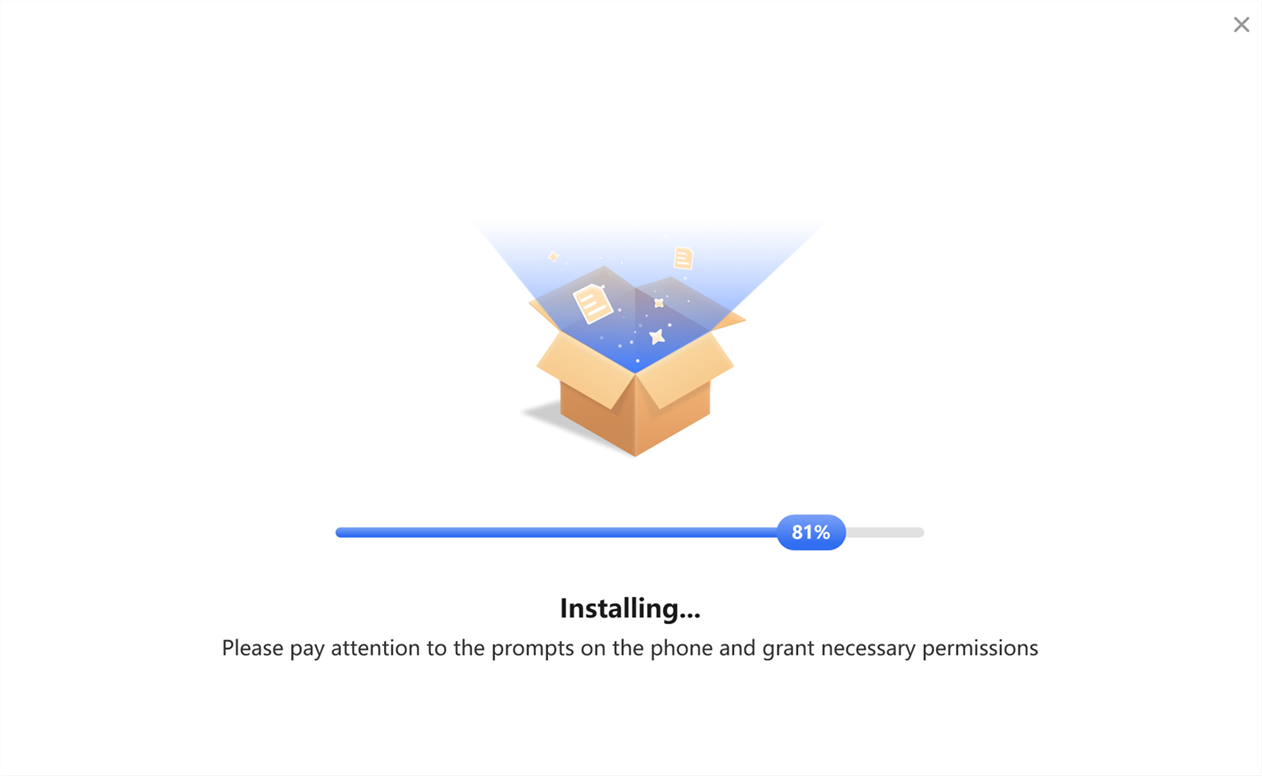
Install Game Resource Pack
Step 7. Complete Android Device Connection.
Once all components are installed, the program will automatically complete the connection process. To ensure a smooth setup, keep your device connected and unlocked throughout.
Load Your Android Device
After the connection is established, you can start using Game Mode with improved stability and compatibility.
Complete Android Device Connection
If you have further questions after reading this guide, please refer to the FAQs page or contact our Support Team for assistance.
Fonelora Location Changer Connect Android to Computer FAQs
1. Why is my Android device not recognized by Fonelora Location Changer?
This issue is typically caused by permission restrictions or incorrect connection settings. Ensure that your device is unlocked, USB debugging is enabled, and the USB connection mode is set to Media Transfer Protocol (MTP). Additionally, verify that your USB cable supports data transfer (not charging only). If the problem persists, reconnect the device, switch USB ports, or restart both the phone and computer to refresh the connection environment.
2. Can I connect my Android device to the computer via Wi-Fi?
Yes, Wi-Fi connection is supported, but only after the initial USB connection has been successfully completed. This first connection establishes the necessary trust and authorization between devices. For Wi-Fi connection to work properly, both the Android device and the computer must be connected to the same local network.
3. How do I enable USB debugging on Android devices?
USB debugging can be enabled by first activating Developer Mode. Navigate to Settings > About Phone, tap Build Number seven times until Developer Mode is unlocked, then go to Developer Options and enable USB Debugging. This feature allows the computer to communicate with your device at a system level.
4. Why does the USB debugging authorization prompt not appear?
If the authorization dialog does not appear on your device, it may be due to a temporary communication interruption. You can trigger the prompt again by clicking “Show Again” in the program, reconnecting the USB cable, or toggling USB debugging off and on. In some cases, restarting the device can also restore the authorization request.
5. Is it safe to enable Developer Mode and USB debugging?
Yes, both Developer Mode and USB debugging are official Android features intended for development and advanced device interaction. They do not pose a risk when used with trusted software. You can disable these options at any time after completing the setup process.
6. What should I do if the connection is unstable or frequently disconnects?
Connection instability is often related to USB hardware or system interruptions. Try using a different USB cable or port, avoid using USB hubs, and keep your device unlocked during use. Disabling battery optimization or background restrictions on your Android device can also improve connection stability.
7. What if Game Mode installation doesn't go as expected?
Game Mode requires additional components to function properly. If the installation doesn't go as expected, please check that your internet connection is stable, there is enough available storage space, and all necessary permissions are enabled on your device. Reconnecting the device and trying the setup again usually resolves the issue.
8. Does Fonelora Location Changer support all Android devices?
Fonelora Location Changer supports most Android devices running Android 5.0 and above. However, due to manufacturer-specific system restrictions or custom ROM limitations, compatibility may vary slightly across devices. Keeping your system updated can improve compatibility.